Finally switched from Ubuntu to Linuxmint after the 14.04 release. The distribution installed so many packages that I would never use, and the Unity desktop rendered slow on my old thinkpad 🙁

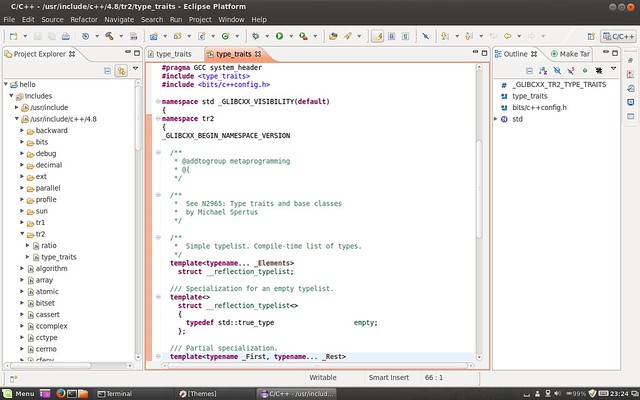
After trying Linuxmint 17 in VirtualBox, I found the color of its default theme is not so good. The mixture of grey and light green, sometimes made it a bit hard to detect borders. It also made me feel comfortless when using eclipse:

mint17-1

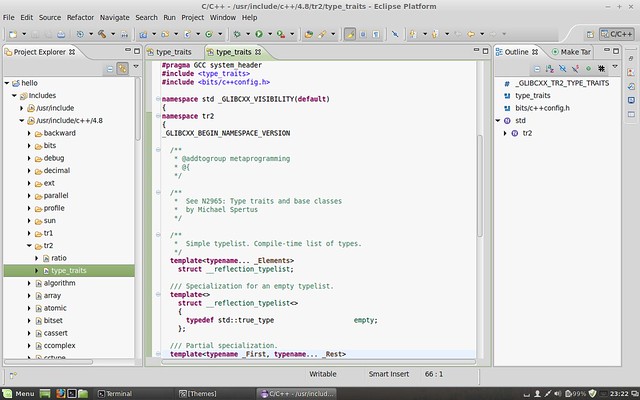
So I managed to reuse the default theme of Ubuntu within the cinnamon desktop from Linuxmint:

mint17-2

Here’s what I did:

This installs the Ubuntu themes. Now edit the theme to add support for Nemo:

Add one line to the end of the file:

Create the new nemo.css file:

Replace all “nautilus” with “nemo”, “Nautilus” with “Nemo”:

Updated Aug 14: Alternative color in Nemo is not available. It seems to be a bug(LP#945430) in the ubuntu theme.

Now open your “Themes” configuration, go to “Other settings” tab. Set “Controls” to “Ambiance”, set “Icons” to “ubuntu-mono-dark”, set “Window borders” to “Ambiance”.

UCK stands for Ubuntu Customization Kit: https://launchpad.net/uck

We can use PPA to install it:

And you’ll find it in under “System Tools” section of your menu. Follow the wizard to create your own Ubuntu image. It will extract your Ubuntu image, and also the squashfs on it. 5G free disk space is required under ~/tmp. The final customized image locates as ~/tmp/remaster-new-files/livecd.iso.

I tried to use a 10.04.4 image as base image. It ends with message:

Don’t worry. The final image is already created. isohybrid is in syslinux package 3.72 and later. But Ubuntu 10.04 has only 3.63.

Now you can use the image like the source image. Either burn it or use it to install from harddisk. I integrated all Chinese supports, codecs and some development tools. See screenshot of my livecd:

ubuntu_uck

Seems it’s quite easy to make my iPod touth 4 (iOS 5.0.1) work. 2 packages need update using PPA here. Or you can simply download them and install:

Now your audios/videos in your iOS devices are recognized in Rhythmbox :).

Ubuntu Lucid(10.04) originally ships with 2.6.32 kernel. But on my T420 thinkpad, the wireless card is not recognized and graphics card is not functional well. Then I switched to 2.6.38 backport kernel, and installed bumblebee package to utilize the Nvidia Optimus Technology. Now the 3.0.0-16 backport kernel is out, it contains the fix for “rework ASPM disable code”, and it should do a better job in power saving even using the discrete Nvidia card. Moreover, it’s the new LTS kernel, so I decided to update to the 3.0 kernel. Please follow the steps if you are interested:

1. Add X-Updates PPA

These commands install official nvidia driver. Currently, it’s the 295.20 version.

2. Enable Nvidia Driver

This will let you to choose opengl engines. Select nvidia over mesa. This will also enable nvidia Xorg drivers, blacklist nouveau driver and add nvidia-xconfig into /usr/bin. You may find warnings like:

Just ignore them, seems to be safe.

This will generate new /etc/X11/xorg.conf file for your Nvidia card. If you cannot find the command, the original location is: /usr/lib/nvidia-current/bin/nvidia-xconfig

3. Fix ld Bindings

This just add an ld path into /etc/ld.so.conf.d/GL.conf, otherwise, glx module cannot be loaded correctly. Here’s the /etc/log/Xorg.0.log segments:

Now, update ld runtime bindings and reboot.

4. Verify

If your installation is successful, the output looks like:

After installing the driver, hedgewars shows 120fps. While it used to show 4fps. It’s a great improvement. 🙂

hedgewars

http://ubuntu-tutorials.com/2010/01/16/reset-gnome-keyring-password-on-ubuntu/

Just copy the solution here:

Method 1:
It is possible to clobber your keyring passphrase and settings from the Terminal. Open a terminal (Applications > Accessories > Terminal), and run the command:

On older systems you may need to try:

Method 2:
The second method bypasses the Terminal and uses the graphical interface strictly. To delete your current keyring, follow the steps below:

  1. Navigate to Applications > Accessories > Passwords and Encryption Keys
  2. Select the far-right tab “Passwords”
  3. Select your keyring
  4. Right-click and attempt “Change Password” or, if that doesn’t work, select “Delete”